
Tag

Refresh

Browsing


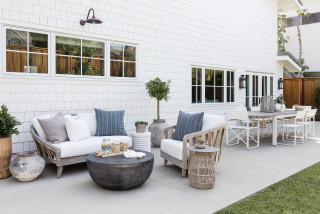
An outdoor dining area can function as an extension of the home, providing additional space for hosting family and friends. The popularity of al fresco entertaining has soared recently as more people take advantage of outdoor living areas. You can make your outdoor dining experience even better with these upgrades, which range from simple updates to larger projects. Here are 10 ways to add color, style and function to your outdoor dining area.

Digs Design CompanySave Photo
1. Dress Up Your Table

No budget to buy new dining furniture this year? Pick up some fresh table linens, seat cushions, place mats, napkins and colorful outdoor dishes to add pizazz without the price tag. New accessories go a long way toward elevating the festive factor.

10 Outdoor Living Essentials to Get Ready for Summer

KD Designs Custom InteriorsSave Photo
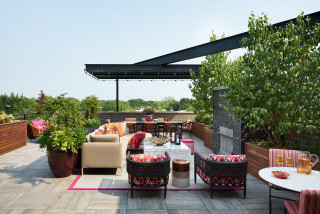
2. Roll Out a Rug

Protect your patio or deck while adding pattern, texture and a punch of color to your outdoor dining area with a large outdoor rug. Choose one that’s weather- and stain-resistant so it lasts more than one season.

Pro tip: Keep the rug’s edges from curling up by placing furniture legs in strategic spots or roll up some masking tape into balls and place it under the corners.

Edible Earth ResourcesSave Photo
3. Plant a Vertical Herb Garden

Limited space to plant culinary herbs for your grilling area? Look up! Outdoor kitchens can benefit from a living wall made from a specialized vertical garden system or horizontally hung gutters. Not only will a vertical garden add color and texture, but you can snip fresh herbs to season your dishes whenever you need them. Also consider vertically hanging some strawberry or cherry tomato plants to pluck produce straight from the vine.

Find home design and remodeling professionals on Houzz

Flavin ArchitectsSave Photo
4. Incorporate Music With Outdoor Speakers

Get the outdoor party started by spinning your favorite playlist (keeping neighbors in mind when it comes to volume, of course). There are many wireless speakers on the market that can withstand the elements. Some are even designed to look like elements of a landscape, such as boulders. Others can be hung in the corners of your patio or set up on side tables.

Cathie Hong InteriorsSave Photo
Clear ConstructionSave Photo
6. Brighten Things Up With Outdoor Lighting

You’ll need both task and ambient lighting to accommodate evening cooking and entertaining. Clip lights to your barbecue’s lid, hang up rows of string lights for some sparkle and set up freestanding lanterns or hurricane lamps with wax or artificial candles to keep the glow going while you’re outside.

Del Gavio GroupSave Photo
7. Extend Patio Season by Adding Heaters

Who says you can’t enjoy your deck area in early spring or late fall? By installing natural gas or portable propane patio heaters — which can be safely used under eaves and pergolas — you can spend more time outdoors with loved ones. If you have an overhang on your house, you can also put outdoor-rated infrared heaters in the ceiling above your dining or lounge areas.

BellCraft ArchitectsSave Photo
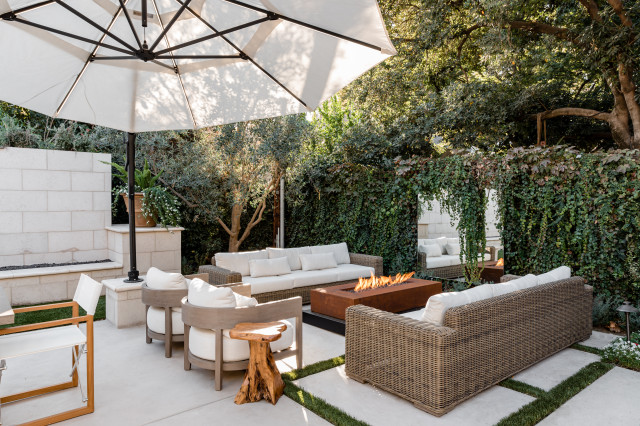
8. Add a Fire Feature

A fireplace, fire table or several fire columns can transform a ho-hum patio into a spot where everyone wants to gather. Having a fire feature not only adds an outdoor focal point, it also helps you stay warm on chilly evenings as summer wanes. Choose from hundreds of models on the market, including some that double as dining tables — they come with a removable top that hides the gas fire feature underneath.

10 Things to Know About Buying a Fire Pit for Your Yard

9. Put Up a Privacy Screen

If you live in an urban or suburban neighborhood, you might be able to see your neighbors over the fence and vice versa. If you need more privacy in your outdoor kitchen or dining area, install a decorative screen that’s both functional and beautiful. Choose ones made from wood, wrought iron with cutout designs, bamboo or lattice for added visual appeal.

Why You Should Consider a Landscape Screen for Your Yard

Clear ConstructionSave Photo
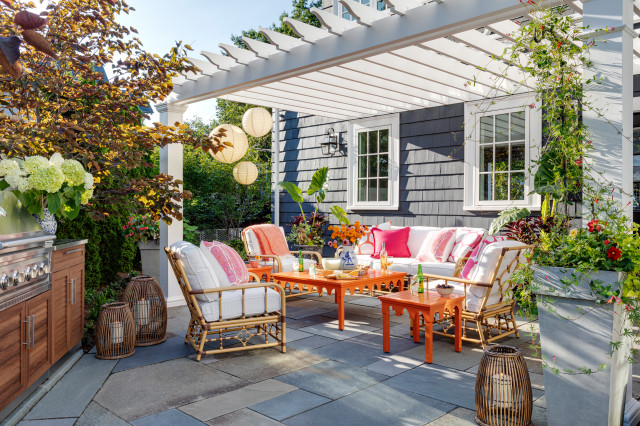
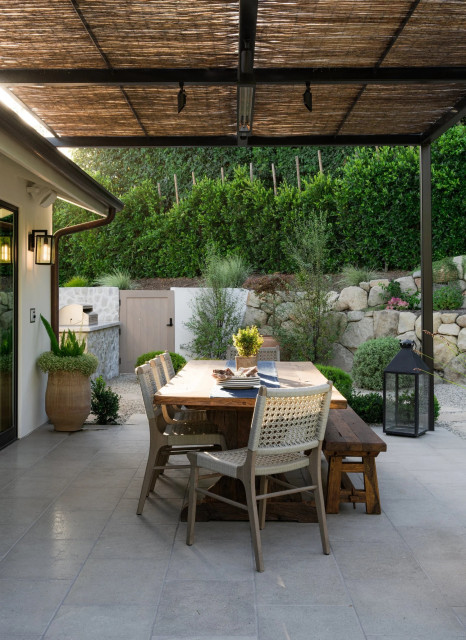
10. Add a Pergola or Retractable Awning

Because you might want to enjoy being outside even if the sun is blazing or the rain is pouring down, consider adding a structure overhead to create shade, shelter and interest. There are many options to choose from, including pergolas, arbors, shade trees and retractable awnings that can protect you from the elements when needed. Bonus: If you add an open-air structure, you can plant flowering vines and enjoy their scent all season.

More on Houzz
Read more landscape stories
Browse outdoor photos for ideas
Find a landscape contractor


This article was originally published by a
www.houzz.com . Read the Original article here. .


Kandrac & Kole Interior Designs, Inc.Save Photo

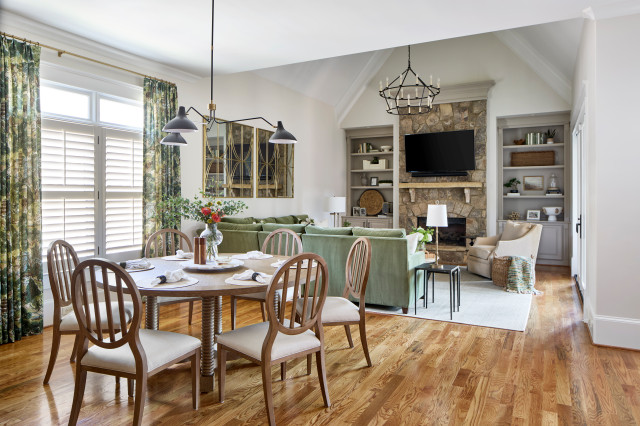
The kitchen, casual eat-in area and family room are all open to one another. One major change was replacing three windows on the right with glass doors that lead to an existing screened-in porch. Having a casual eat-in area where the whole family can enjoy meals together was important to the homeowners.

Across the room, the color palette for the great room began with these drapes. “They were the jumping-off point for everything,” Kandrac says. “It’s kind of a chinoiserie pattern with lots of greens, and it also has camel tones that play off the stone fireplace and the floors.”

Because the three spaces form one open great room, the designers carefully considered how the light fixtures would work together. The family room’s vaulted ceiling required a large-scale chandelier, so they chose a two-tiered fixture that would not block the TV. For the dining area, they chose a 47-inch chandelier that’s proportionate to the 60-inch-diameter table below. The two chandeliers differ in style, but their black-and-gold finishes tie them together.


This article was originally published by a
www.houzz.com . Read the Original article here. .


Kandrac & Kole Interior Designs, Inc.Save Photo

The kitchen, casual eat-in area and family room are all open to one another. One major change was replacing three windows on the right with glass doors that lead to an existing screened-in porch. Having a casual eat-in area where the whole family can enjoy meals together was important to the homeowners.

Across the room, the color palette for the great room began with these drapes. “They were the jumping-off point for everything,” Kandrac says. “It’s kind of a chinoiserie pattern with lots of greens, and it also has camel tones that play off the stone fireplace and the floors.”

Because the three spaces form one open great room, the designers carefully considered how the light fixtures would work together. The family room’s vaulted ceiling required a large-scale chandelier, so they chose a two-tiered fixture that would not block the TV. For the dining area, they chose a 47-inch chandelier that’s proportionate to the 60-inch-diameter table below. The two chandeliers differ in style, but their black-and-gold finishes tie them together.


This article was originally published by a
www.houzz.com . Read the Original article here. .


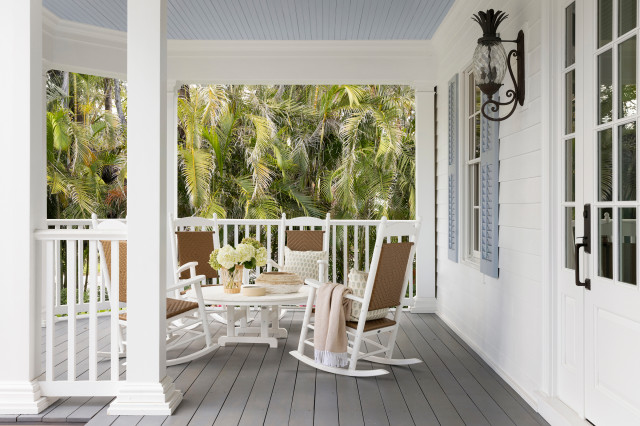
Garrison Foundry Architecture + DecorSave Photo
1. Clean, Declutter and Repair

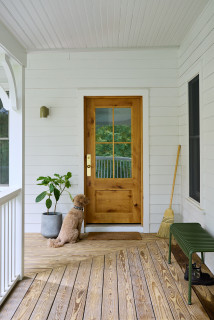
Imagine a guest standing at your front door, waiting for you to answer. What is your porch telling them about what they’ll find inside?

If they’re seeing dirt, dings and cobwebs, the message won’t be a good one. So before adding flowers, furniture or seasonal decor, start with a good scrub. Remove everything and wash every surface, including the front door, windows, light fixtures and railings. Shake out or wash the doormat, touch up chipped paint and replace ripped screens. Even the smallest, humblest porch will feel welcoming — to you and your guest — if it’s clean, tidy and in good repair.

Once your space is clean and uncluttered, you’ll have a clearer sense of whether it needs a simple sprucing-up or calls for a more substantial remodel. For bigger design or construction projects, consider enlisting a pro, many of whom can be found on Houzz.

Find a design-build firm on Houzz


This article was originally published by a
www.houzz.com . Read the Original article here. .


Stock Dutch DesignSave Photo
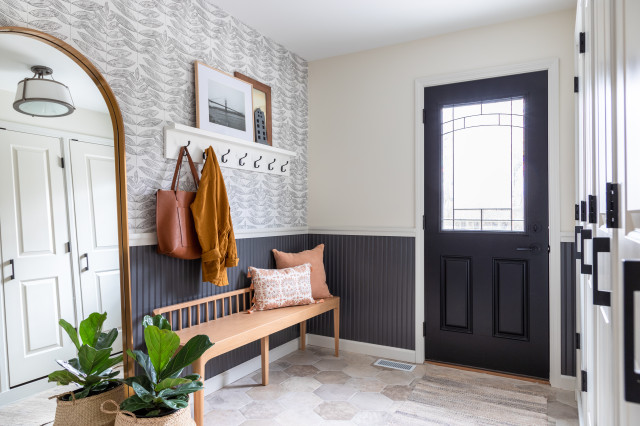
Also keep in mind these standard hook heights (above the floor):
Adults: 60 inchesChildren: 36 inchesWheelchair access: 42 to 48 inchesWhen installing individual hooks, leave about 4 to 6 inches between them (or up to a foot if you regularly hang very bulky items), and anchor them securely by drilling into a stud or using heavy-duty wall anchors.

Don’t be afraid to mix and match hook shapes or vary their heights for added interest and functionality — especially in households with children. Just stick to a consistent finish and overall design style to keep the look cohesive, and ensure that no sharp hooks are in anyone’s path of travel.

If you have enough floor space, a coat tree is a charming, freestanding and tool-free alternative to coat hooks — perfect for renters, the drill-averse and homes with brick or plaster walls. Choose one with a wide base for stability.


This article was originally published by a
www.houzz.com . Read the Original article here. .


Mason London DesignSave Photo
15. Take movie night outdoors. Turn your yard into an outdoor movie theater. A full outdoor theater is a commitment, but for an occasional family-and-friends movie night, especially if you aren’t fussy about quality, you can get by with a portable screen, white sheet or wall; a reliable projector or favorite movie player; speakers that can compete with ambient nighttime sounds from traffic noise or windy gusts; and some comfortable lawn chairs or lounges.

Locate your screen in a spot that’s relatively free from adjacent lighting, and set up the projector and sound system. Also, be aware of how your location will affect your neighbors. You don’t want to blast them out with loud sounds or project something unsettling, such as a horror flick, to the neighborhood. Then just add popcorn and enjoy.

10 Etiquette Rules for Outdoor Living


This article was originally published by a
www.houzz.com . Read the Original article here. .


Before Photo

McGuire + Co. Kitchen & BathSave Photo

“After” photos by Regina Mallory Photography

Kitchen at a Glance
Who lives here: A family of five
Location: Wakefield, Massachusetts
Size: 159 square feet (15 square meters), plus a mudroom and bar area of 231 square feet (21 square meters)
Designer: Amanda Colosi Johnson of McGuire + Co. Kitchen & Bath

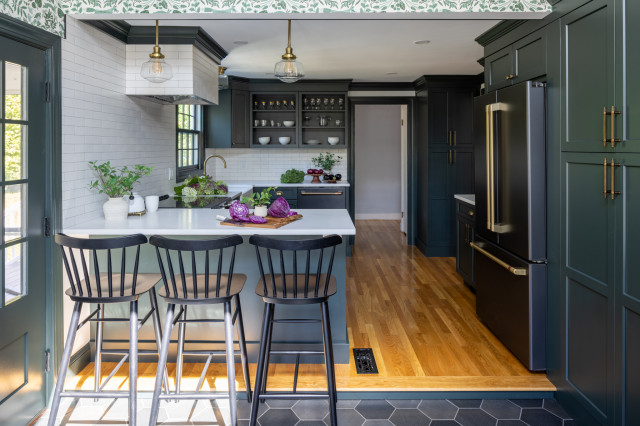
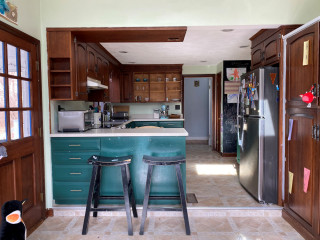
Before: The U-shaped layout worked for the family, but the dated finishes needed an update. The dark brown and cottage green cabinetry, along with vinyl tile flooring and standard appliances, had run their course. “This couple is a lot of fun and not afraid of color, pattern and texture,” Colosi Johnson says. “That’s why the homeowners painted those cabinets themselves that cottage green.”

A large refrigerator on the right jutted out from the cabinetry. A peninsula with two backless stools and hard-to-reach drawers separated the kitchen from the bar and mudroom area. The door on the near left leads to a sun porch, while the back doorway opens to a hall with a powder room. “We pursued looking into options on how we could change up the layout, but it didn’t make sense to do that,” Colosi Johnson says. “We wanted to problem-solve.”


This article was originally published by a
www.houzz.com . Read the Original article here. .


Mindy Gayer Design Co.Save Photo
1. Do a Deep Clean

Sometimes, the simplest approach is also the most rewarding. Patio surfaces are designed to take a lot of wear and tear, so you may not notice when they’re not looking quite as pristine as they once were.

To keep patios looking their best, take a day to give the space a good cleaning. Clear off the moveable furnishings, sweep the floor well and then wash or treat the surface with the appropriate cleanser. Often, a mix of warm water and dish detergent, plus a sturdy broom, is sufficient. Let it dry, then put everything back in place.

While you’re at it, clean any cushions and patio furnishings that have become a bit grungy or stained. Usually scrubbing items with a solution of warm water and dish detergent, then rinsing them and letting them dry, is all that’s needed. You may have to work a bit to get off stubborn stains, but the clean look will be worth it.

Find a landscape contractor


This article was originally published by a
www.houzz.com . Read the Original article here. .


Camden Grace LLCSave Photo
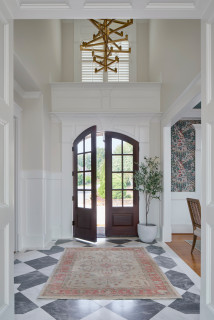
9. Upgrade Your Window Treatments

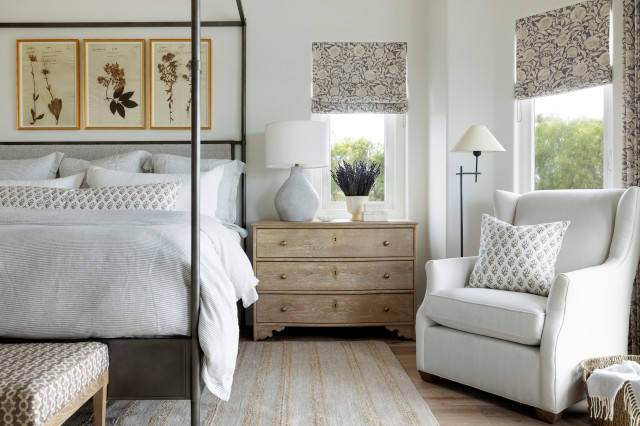
Replacing bland window treatments with elegant draperies or shades makes any room look finished. But the right window treatments can do much more, including dampen sound, provide insulation, block light and enhance privacy — all critical in a bedroom. If yours are failing in any of these regards, think of an upgrade as an investment in your well-being.

Sheer curtains can be layered over a roller or cellular shade for privacy and light control. Thick or lined draperies don’t necessarily need to be layered, but if you go without, swap your straight rod and finials for a French return curtain rod, which bends all the way to the wall, to block more light. Similarly, if choosing Roman shades, you’ll have less light leakage if you select an outside mount shade than an inside-mount design.

That said, while we need darkness to fall (and stay) asleep, the morning sun is helpful for waking us up. Blackout shades can disrupt that natural cue. If you need them, one solution is to install smart shades that are raised automatically at a designated time in the morning.

Which Window Treatment Should You Choose?

What to Know About Curtains and Drapes


This article was originally published by a
www.houzz.com . Read the Original article here. .


Mathis Custom RemodelingSave Photo
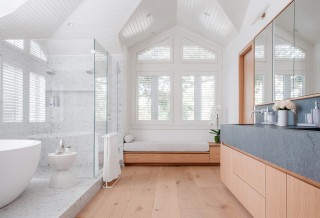
10. Level Up Your Lighting

Lighting is often called the jewelry of a room, but given its functional importance, especially in a bathroom, that analogy might be selling it a bit short.

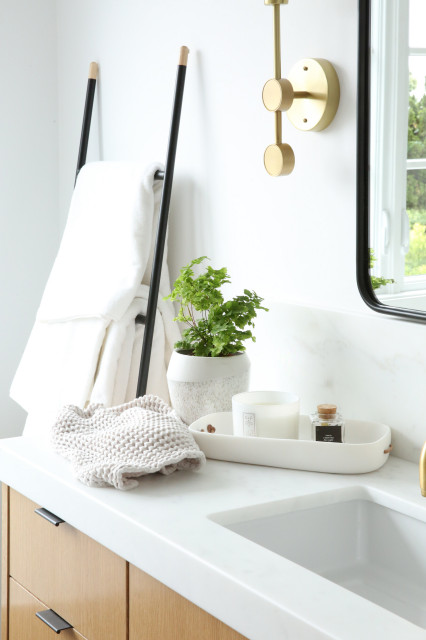
One easy way to improve the functionality, safety and look of a bathroom through lighting is to add hidden LED strips. They can be placed under toe kicks, shelves and cabinets, boosting ambient light during the day and providing soft illumination at night. Waterproof versions can illuminate your shower niche or threshold, improving visibility. The strips can be hardwired by an electrician, but they’re also available in plug-in and rechargeable versions.

Some light fixtures are designed to be virtually invisible. The rest, including your vanity sconces, should work hard and also look great. The easiest approach is to keep your new sconces in the same locations as the old ones, but if your vanity sconces are overhead, you may want to hire an electrician to move them to either side of your mirror. This will provide more even lighting and an up-to-date look.

Tip: Be sure to check whether fixtures are damp- or wet-rated and to adhere to local code when replacing or moving fixtures.

Your Guide to Perfect Bathroom Vanity Lighting

Tell us: What small updates made a big difference in your bathroom? Share in the Comments.

More on Houzz
Read more stories about bathroom design
Find a bathroom remodeler
Shop for bathroom products


This article was originally published by a
www.houzz.com . Read the Original article here. .
Pin It